Picture this: a magical workshop rolling down Main Street, covered in twinkling lights, with giggling elves waving to the crowd and you built it for under $150. Sound impossible? It’s not!
A DIY Christmas parade float with a Santa’s Workshop theme is one of the easiest, most recognizable, and most affordable options. It’s perfect for school groups, family teams, community organizations, or anyone who wants a festive float that looks impressive but is simple to build.
Total build time: 4-6 hours over a weekend
Here’s how to create your own Santa’s Workshop float step-by-step using inexpensive materials.
Why Santa’s Workshop?
It’s:
- Easy to build with Dollar Tree + craft store supplies
- Fun for kids and groups
- Flexible- mall or large versions both work
- Full of bright colors and simple shapes
- Adorable with little “elf workers” riding on the float
Plus, everyone instantly recognizes it.
Budget-Friendly Supplies You’ll Need
Base materials:
- Flatbed or utility trailer (consider renting on towlos if you don’t have one)
- Cardboard sheets / moving boxes
- Brown craft paper or tan wrapping paper
- Red and white poster board
- Zip ties
- Duct tape
- Hot-glue gun
- Garland
- Battery-powered string lights
- Cotton or polyfill “snow”
- Cheap toy tools or plastic presents
- White bed sheets
- Paint or markers
Most of this can come from Dollar Tree, Walmart, or thrift stores.
Step-by-Step: Build Your DIY Santa’s Workshop Float
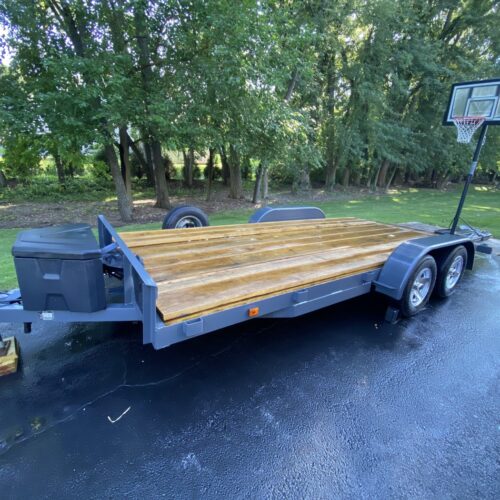
Step 1: Choose Your Trailer
A flatbed or utility trailer works best because it’s:
- Easy to attach cardboard walls
- Has plenty of standing/sitting room
- Simple to cover with snow, presents, and decorations
Don’t have the right trailer? Renting one takes the pressure off and gives you a clean starting point perfect for building.
Step 2: Build the Workshop Walls (Simple Cardboard Magic)
or your DIY Christmas parade float, you’ll create simple “workshop walls” along the sides of your trailer.
How to do it:
- Attach cardboard panels to the side rails using zip ties or tape
- Cover them with brown craft paper to mimic wood walls
- Use strips of red or white poster board to create “wood beams” or candy-cane corners
- Add big square “windows” using black paper or trash bags with white tape crossed like window panes
Instant workshop look for under $20.
Step 3: Create the Workshop Sign
A large, bold sign is what makes it Santa’s workshop.
Make a sign that says:
- “SANTA’S WORKSHOP”
- or “ELF TOY FACTORY”

Materials:
- Poster board
- Red & green paint
- Glitter letters (optional)
Step 4: Add Snow to the Floor
Cover the trailer floor with:
- White sheets (thrift store!)
- Cotton batting
- Polyfill stuffing
Tape or clip it down securely. This instantly makes the float look polished and festive.
Step 5: Build the “Toy Area”
Every Santa’s Workshop needs a toy-building zone on your DIY Christmas parade float.
Ideas:
- Wrapped cardboard “presents” stacked high
- A small kid’s workbench or folding table
- Plastic toy tools
- Toy trucks, stuffed animals, balls, etc.
Most items can be borrowed or bought at Dollar Tree. Set this up on one side of the float as the “toy-making station.”
Step 6: Add Your Elves + Characters
This float theme is super fun for participants.
Riders can dress as:
- Elves
- Santa
- Mrs. Claus
- Reindeer
- Toy makers
Add a stool or bench for elves to “work” while the float moves.

Safety note: Make sure all riders have secure seating with something to hold onto. Use seat belts or safety straps if possible, and ensure children are always supervised by adults on the float.
Step 7: Bring It to Life with Lights
Use battery-powered lights to avoid cords.
Where to place them:
- Around workshop windows
- Around the sign
- In the garland
- Around the floor snow
- Around stacks of presents
Lights make even simple cardboard look professional.
Step 8: Do a Quick Test Tow
Before parade morning:
- Tow the float around the block
- Check for wobbly cardboard
- Reinforce anything shifting
- Add more zip ties or tape as needed
Parade floats always need last-minute touch-ups — totally normal.
Troubleshooting Common Issues
Wind blowing decorations off?
- Add extra zip ties to lightweight items
- Use fishing line to secure garland
- Weight down bottom edges of cardboard with sandbags or bricks
Rain in the forecast?
- Cover cardboard walls with clear plastic sheeting or tarps
- Use waterproof tape
- Have a backup plan: focus on items that won’t be ruined by light moisture
Decorations coming loose during the parade?
- Bring a “repair kit” with extra zip ties, duct tape, and safety pins
- Have someone walk alongside during the parade to quickly fix issues
Cost Breakdown
You can build this entire float for $60–$150, depending on what you already have. It’s one of the most budget-friendly Christmas float themes, and it looks so cute.
Final Thoughts
A Santa’s Workshop float is fun, classic, and incredibly easy to DIY—perfect for anyone who wants a magical parade moment without a complicated build or big budget.
Need a trailer to build on? Platforms like Towlos let you rent utility trailers affordably, so you can focus on the fun part: bringing your Santa’s Workshop float to life!