
If you’re new to towing or need to replace a worn-out connector, wiring a 7-way trailer connector might seem daunting at first. However, with the right tools, a bit of patience, and a clear guide, you can handle this task. A 7-way connector is essential for towing trailers with brakes, lights, and other accessories. In this comprehensive guide, we’ll walk you through everything you need to know to wire a 7-way trailer connector safely and correctly.
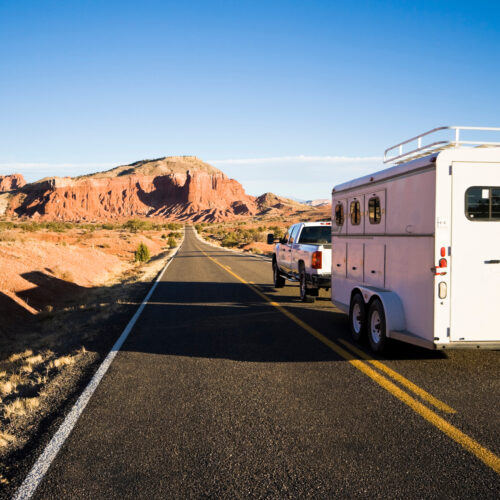
Whether you’re wiring a connector for your own trailer or preparing to rent one for a specific job, understanding the electrical system ensures safe towing. For one-time projects or trying before you buy, consider renting a trailer on towlos – you can find trailers with the right connector already installed and ready to go.
In This Guide
- Understanding 7-Way Wiring Standards (SAE J2863 vs RV Standard)
- Tools and Materials You’ll Need
- Understanding the Wiring Diagram
- Step-by-Step Wiring Instructions
- Testing Your Connection
- Troubleshooting Common Issues
- Common Mistakes to Avoid
- Maintenance and Long-Term Care
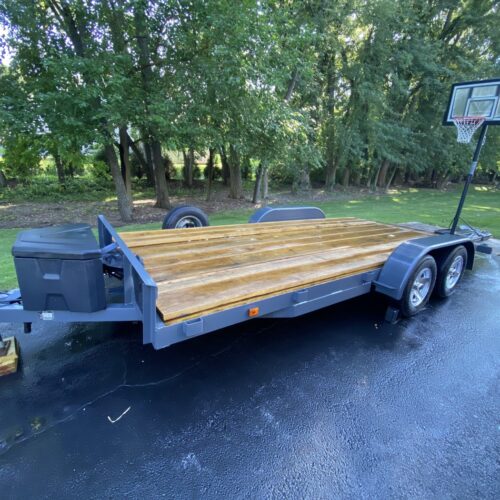
- When to Rent vs Own a Trailer
⚠️ CRITICAL: Two Different Wiring Standards
Before you start, you MUST identify which wiring standard your trailer uses. Using the wrong wire colors will cause your lights to malfunction and create dangerous road conditions.
Two wiring standards exist for 7-way blade connectors:
- SAE J2863 (Traditional SAE) – Most common on utility trailers, cargo trailers, gooseneck trailers, and equipment trailers
- RV Standard – Most common on travel trailers, fifth wheels, and campers
Important: The pin positions and functions are identical between both standards – only the wire colors are different. A trailer wired with SAE colors will physically connect to a vehicle wired with RV colors, but you need to match functions, not wire colors.
This guide covers the SAE J2863 (Traditional SAE) wiring standard. If you have a travel trailer or RV, you likely need the RV Standard – see the comparison table below.
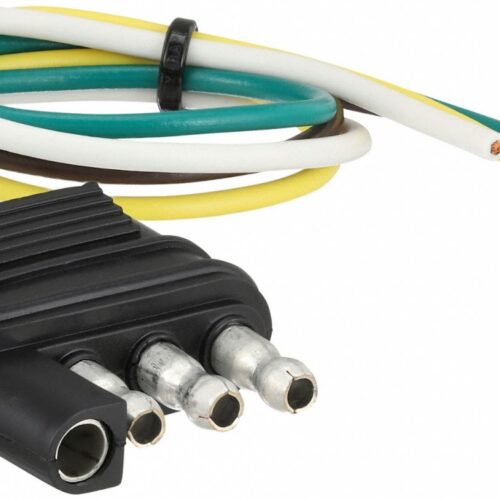
Tools and Materials You’ll Need
Before starting, gather these essential tools and materials:
- 7-way trailer connector kit (verify SAE J2863 or RV Standard based on your trailer type)
- Wire strippers
- Heat shrink tubing (preferred) or electrical tape
- Wire cutters
- Screwdriver or socket set
- Multimeter (highly recommended for testing)
- Heat gun or lighter (if using heat shrink tubing)
- Dielectric grease (optional but recommended for weather protection)
💡 PRO TIP: Quality Materials Matter
Heat shrink tubing provides superior protection compared to electrical tape, especially in wet conditions. You can find these materials at most auto parts stores. When renting a trailer, be sure to look for quality “Extras” available with towlos trailers – many hosts offer useful Extras like straps, hitches, ramps, and safety equipment with their rentals.
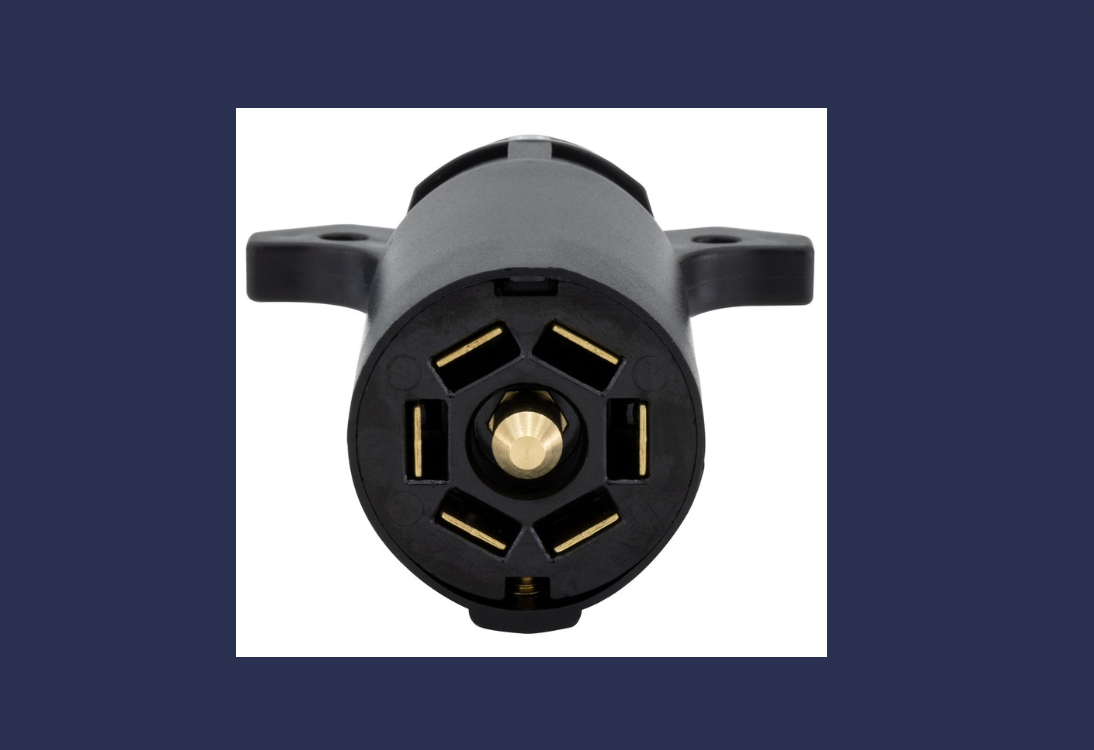
Understanding the Wiring Diagram (SAE J2863 – Traditional SAE)
This guide focuses on the SAE J2863 (Traditional SAE) wiring standard, which is most commonly used on utility trailers, cargo trailers, gooseneck trailers, and equipment trailers. All 7-way blade connectors have seven pins with the same functions in the same positions – only the wire colors differ between standards.
| Pin # | Wire Color | Function |
|---|---|---|
| 1 | White | Ground – Completes the electrical circuit and prevents shorts. Must be properly connected to the trailer frame. |
| 2 | Blue | Electric Brakes – Powers the trailer’s electric brakes. Requires a brake controller in your vehicle. |
| 3 | Brown | Tail/Running Lights – Powers the trailer’s taillights and running lights (on when headlights are on). |
| 4 | Yellow | Left Turn/Brake Lights – Controls the left turn signal and brake lights. |
| 5 | Green | Right Turn/Brake Lights – Controls the right turn signal and brake lights. |
| 6 | Purple | Backup Lights – Powers the trailer’s backup/reverse lights (on when in reverse gear). |
| 7 | Red/Orange | 12V Auxiliary Power – Provides constant 12V power to trailer accessories (interior lights, battery charging, refrigerators, etc.). |
Important: Confirm your connector’s wiring diagram before starting. Some connectors may have slightly different pin layouts, so always reference the diagram that comes with your specific kit.
Comparison: SAE J2863 (Traditional SAE) vs RV Standard
If you have a travel trailer, fifth wheel, or camper, you may have the RV Standard instead. Here’s a side-by-side comparison:
| Pin # | Function | SAE J2863 (Traditional SAE) |
RV Standard |
|---|---|---|---|
| 1 | Ground | White | White |
| 2 | Electric Brakes | Blue | Blue |
| 3 | Tail/Running Lights | Brown | Green |
| 4 | Left Turn/Brake | Yellow | Red |
| 5 | Right Turn/Brake | Green | Brown |
| 6 | Backup Lights | Purple/Grey | Yellow |
| 7 | 12V Power | Red/Orange | Black |
Key Takeaway: White (ground) and Blue (brakes) are the same in both standards. All other colors differ. Always verify your trailer’s wiring standard before connecting wires.
Step-by-Step Wiring Instructions
Step 1: Prepare the Wires
Proper wire preparation is critical for reliable connections:
- Strip approximately 1/2 inch of insulation from the end of each wire
- Twist the strands together tightly to prevent fraying
- If using heat shrink tubing, slide it onto the wire BEFORE making the connection
- Ensure all wires are clean and free from corrosion
Step 2: Connect the Wires to Pins
Follow these connections for SAE J2863 (Traditional SAE) wiring standard. If you have RV Standard wiring, refer to the comparison table above for correct wire colors.
- Pin 1 (Ground – White wire): Connect to the ground terminal. This is typically the largest pin and connects to the trailer frame. This is the most important connection for preventing electrical issues.
- Pin 2 (Electric Brakes – Blue wire): Connect to the brake wire. This provides power from your brake controller to the trailer’s electric brakes.
- Pin 3 (Tail/Running Lights – Brown wire for SAE / Green for RV): Connect to the tail light circuit. Powers trailer lights when your headlights are on.
- Pin 4 (Left Turn/Brake – Yellow wire for SAE / Red for RV): Connect to the left turn and brake signal wire.
- Pin 5 (Right Turn/Brake – Green wire for SAE / Brown for RV): Connect to the right turn and brake signal wire.
- Pin 6 (Backup Lights – Purple/Grey wire for SAE / Yellow for RV): Connect to the reverse light circuit (if your trailer has backup lights).
- Pin 7 (12V Power – Red/Orange wire for SAE / Black for RV): Connect to a constant 12V power source. This powers accessories like interior lights, battery charging, or refrigerators.
Step 3: Secure the Connections
After connecting all wires, properly secure them to prevent failures:
- Using heat shrink tubing (recommended): Slide the tubing over each connection and apply heat with a heat gun or lighter until it shrinks tightly around the connection.
- Using electrical tape: Wrap each connection with multiple layers of high-quality electrical tape, overlapping by half the tape width.
- Apply dielectric grease to the connector’s internal pins to protect against moisture and corrosion.
- Ensure no bare wire is exposed that could cause a short circuit.
Step 4: Mount the Connector
Once connections are secured:
- Position the connector in an accessible location on your vehicle
- Mount securely using the provided screws or bolts
- Ensure the connector faces downward to prevent water accumulation
- Route wires away from hot exhaust components and moving parts
- Use zip ties or wire loom to keep wiring organized and protected
Testing Your Connection
Never skip testing! Confirming proper operation before hitting the road is essential for safety.
Using a Multimeter
- Test for continuity: With the vehicle off, check that each pin has a complete circuit to its corresponding function
- Test for voltage: With the vehicle running and lights on, verify proper voltage at each pin:
- Ground (Pin 1): Should read near 0V (good ground connection)
- Running lights (Pin 3): Should show 12V when headlights are on
- Turn signals (Pins 4 & 5): Should show 12V when activated
- Backup lights (Pin 6): Should show 12V in reverse
- 12V power (Pin 7): Should show constant 12V
- Test electric brakes (Pin 2): Use your brake controller to verify proper voltage output
Functional Testing
Connect your trailer and test each function:
- Running lights: Turn on headlights – trailer taillights should illuminate
- Brake lights: Press brake pedal – trailer brake lights should illuminate
- Left turn signal: Activate left turn signal – left lights should flash
- Right turn signal: Activate right turn signal – right lights should flash
- Backup lights: Shift to reverse – trailer backup lights should illuminate
- Electric brakes: With the trailer connected, test brake controller manually
Important: If any function doesn’t work, DO NOT tow until the issue is resolved. Faulty trailer lights are dangerous and illegal in most jurisdictions.
Troubleshooting Common Issues
No Lights Working
- Check ground connection (Pin 1): This is the most common culprit. Ensure white wire is securely connected to clean, bare metal on the trailer frame
- Verify 12V power at the vehicle connector using a multimeter
- Check for blown fuses in the vehicle’s towing circuit
- Inspect for damaged wiring or corroded connections
Some Lights Working, Others Not
- Test voltage at each pin to identify which circuit is failing
- Verify wire colors match between vehicle and trailer sides
- Check for loose connections at problematic pins
- Inspect trailer bulbs – they may be burned out
Intermittent Connection
- Ensure connector is fully seated and locked in place
- Clean connector pins with electrical contact cleaner
- Check for corrosion inside connector – may need replacement
- Verify mounting is secure and not allowing movement
Electric Brakes Not Working
- Confirm brake controller is properly installed and calibrated
- Check blue wire (Pin 2) for proper connection and voltage
- Test trailer brake magnets with multimeter (should show resistance)
- Verify brake controller settings match trailer specifications
Lights Work but Dim
- Poor ground connection is the likely cause
- Check for voltage drop using multimeter
- Clean ground connection points thoroughly
- Verify wire gauge is appropriate for current load
Common Mistakes to Avoid
The #1 Mistake: Poor Ground Connection
More than 70% of trailer wiring issues stem from inadequate grounding. The white ground wire MUST connect to clean, bare metal on the trailer frame. Sand away paint, rust, and dirt at the connection point. A poor ground causes dim lights, intermittent operation, and electrical shorts.
Other Critical Mistakes
- Mixing up SAE J2863 and RV Standard wiring: Always verify which wiring standard you have before connecting wires – match functions, not colors
- Not using heat shrink or proper tape: Exposed connections will corrode and fail
- Testing after mounting: Always test BEFORE permanently mounting the connector
- Using inadequate wire gauge: Undersized wires overheat and cause failures
- Skipping dielectric grease: Moisture causes corrosion; grease prevents this
- Forcing connections: If pins don’t line up easily, check for correct orientation
- Not securing wiring: Loose wires can chafe on moving parts or melt on exhaust
- Ignoring manufacturer instructions: Different connectors have specific installation requirements
Maintenance and Long-Term Care
Regular maintenance ensures reliable performance and extends connector life:
Routine Inspection Schedule
- Before each towing trip: Visually inspect connector for damage or corrosion
- Monthly (for frequent towers): Test all lighting functions
- Every 3-6 months: Clean connector pins and apply fresh dielectric grease
- Annually: Inspect all wire connections and heat shrink/tape for deterioration
Cleaning and Protection
- Use electrical contact cleaner to remove dirt and oxidation from pins
- Apply dielectric grease to pins before reconnecting
- Store with protective cap when not in use
- Consider a connector cover to protect from road salt and moisture
When to Replace Your Connector
Replace your 7-way connector if you notice:
- Heavy corrosion that cleaning doesn’t resolve
- Bent or damaged pins
- Cracked or broken housing
- Persistent intermittent connections after cleaning
- Melted or burned terminals (indicates overheating)
Seasonal Considerations
- Winter: Road salt accelerates corrosion – clean and grease more frequently
- Summer: Heat can degrade electrical tape – inspect regularly
- Humid climates: Moisture intrusion is more common – use high-quality heat shrink and dielectric grease
When to Rent vs Own a Trailer
Now that you understand 7-way wiring, consider whether owning a trailer makes sense for your needs:
Renting Makes Sense When:
- One-time or occasional projects: Moving, hauling materials, transporting equipment
- Trying different trailer types: Test various sizes and configurations before buying
- Avoiding storage hassles: No need for parking space, maintenance, or insurance
- You want a ready-to-go solution: Browse towlos rentals to find trailers that match your vehicle’s connector type
- Cost-effectiveness: Occasional use doesn’t justify ownership costs
Owning Makes Sense When:
- Frequent use: You tow regularly for work or recreation
- Specific requirements: You need custom features or modifications
- Generating income: List your properly-wired trailer on towlos to earn rental income when you’re not using it
- Always available: Need a trailer ready at a moment’s notice
💡 Turn Your Trailer Into Income
If you own a trailer with a properly maintained 7-way connector, why let it sit idle? List it on towlos and earn passive income when you’re not using it. Many hosts earn enough to cover their trailer payment, insurance, and maintenance costs.
Pro tip for hosts: Stand out by offering useful Extras with your rental – things like tie-down straps, wheel chocks, or a spare tire. Guests love the convenience, and you can charge a small fee or include them to make your listing more attractive.
Frequently Asked Questions
What’s the difference between SAE J2863 and RV Standard 7-way connectors?
SAE J2863 (also called Traditional SAE) is typically used on utility trailers, cargo trailers, gooseneck trailers, and equipment trailers, while RV Standard is common on travel trailers, fifth wheels, and campers. The key difference is the wire color assignments – the pin positions and functions are identical. Both standards will physically connect, but you must match wire functions (not colors) when wiring to ensure proper operation.
Can I install a 7-way connector myself?
Yes! With basic electrical knowledge, proper tools, and careful attention to the wiring diagram, most people can successfully install a 7-way connector. However, if you’re uncomfortable working with vehicle electrical systems or if your trailer requires electric brakes and a brake controller, consider having a professional complete the installation.
How do I test if my 7-way is wired correctly?
Use a multimeter to check voltage at each pin when the corresponding function is activated (lights on, turn signal, etc.). Then connect your trailer and functionally test each lighting circuit. If all lights work as expected and your brake controller activates the trailer brakes, your wiring is correct.
Why do my trailer lights work but appear dim?
Dim lights almost always indicate a poor ground connection. Check that the white ground wire (Pin 1) is connected to clean, bare metal on the trailer frame. Sand away any paint, rust, or corrosion at the connection point. Also verify your wires are the correct gauge for your trailer’s electrical load.
Do I need a brake controller for a 7-way connector?
You only need a brake controller if your trailer has electric brakes that use the blue wire (Pin 2). If your trailer doesn’t have electric brakes, you can leave Pin 2 unconnected. However, most trailers heavy enough to require a 7-way connector also need electric brakes for safe stopping.
Can I use my 7-way connector with a 4-way trailer?
Yes, you can use an adapter to connect a 4-way trailer to a 7-way vehicle connector. These adapters are inexpensive and available at most auto parts stores. Just remember that a 4-way trailer won’t have electric brakes or auxiliary power.
How often should I inspect my 7-way connector?
Visually inspect before every towing trip. Perform functional testing monthly if you tow frequently. Clean and re-grease the connector every 3-6 months or whenever you notice signs of corrosion. Annual in-depth inspection of all wiring and connections is recommended.
Conclusion
Wiring a 7-way trailer connector is a manageable DIY project when you understand the critical differences between connector types, follow the proper steps, and test thoroughly before towing. Whether you’re setting up your own trailer or just learning about towing systems, this knowledge ensures safe travels on the road.
Key Takeaways:
- Verify whether you have Traditional or SAE configuration before starting
- A solid ground connection (white wire, Pin 1) is critical for proper operation
- Always test every function before your first trip
- Regular maintenance prevents problems and extends connector life
- Consider renting if you only need a trailer occasionally
Ready to Hit the Road?
Not ready to tackle the wiring yourself? Browse trailers on towlos that are already set up and ready to tow – no wiring required!
Own a trailer with a 7-way connector? List it on towlos and turn it into passive income while helping others with their towing needs.
Have questions about wiring your 7-way connector? Drop them in the comments below – we’re here to help!
For more towing tips, trailer maintenance guides, and industry insights, explore our complete blog library.