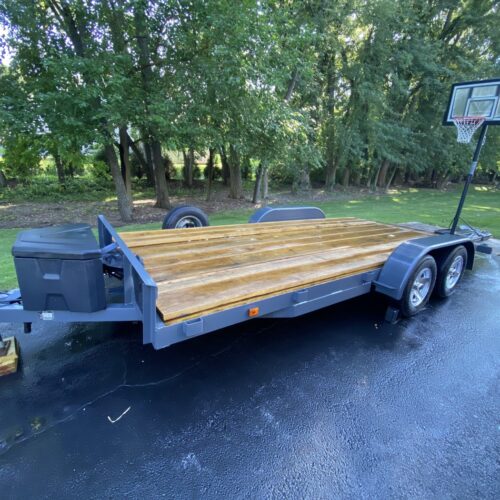
Trailer lights are an essential safety feature for anyone towing a trailer, camper, or boat. They help signal your intentions to other drivers, making sure you can change lanes, turn, and brake safely. However, they’re also one of the more overlooked parts of a trailer until something goes wrong. If you’ve noticed your trailer lights flickering, not working, or just want to upgrade them, fear not! In this guide, we’ll walk you through the process of changing trailer lights step by step.
Why Change Trailer Lights?
Before diving into the “how,” let’s quickly discuss why you might need to change trailer lights:
- Faulty Lights: If your lights aren’t working or are malfunctioning, it’s crucial to replace them promptly. This ensures your safety and the safety of others on the road.
- Upgrade: Maybe you’re looking to upgrade to brighter LED lights for better visibility or aesthetics. Upgrading can be a great investment in the long run, offering increased durability and energy efficiency.
- Regular Maintenance: Like any part of your vehicle or trailer, trailer lights require regular maintenance. Even if they’re still working, it’s a good idea to inspect and replace them periodically to avoid issues on the road.
Tools You’ll Need
Before you begin, gather these basic tools:
- New trailer lights (LED lights are recommended for their longevity)
- Screwdriver or socket wrench (depending on your trailer’s setup)
- Wire stripper/cutter
- Electrical tape
- Wire connectors (butt connectors or soldering equipment)
Step 1: Assess the Situation
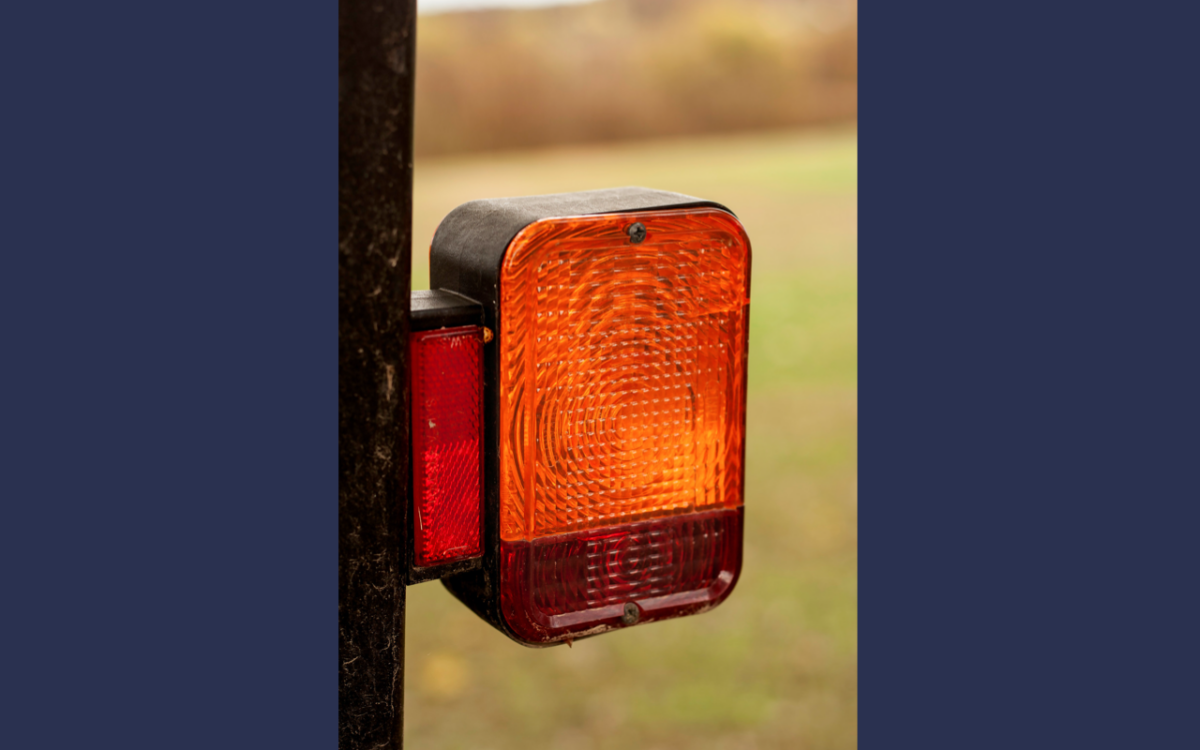
Start by identifying which lights need to be replaced. Most trailers have at least two taillights, two brake lights, and usually one or more turn signal lights on each side. Check both the trailer and the towing vehicle to ensure you’re not missing anything.
Step 2: Disconnect the Power
For safety, disconnect the trailer from the towing vehicle and turn off the power to the trailer lights. This might involve unplugging the trailer from the towing vehicle or removing a fuse from the vehicle’s fuse box.
Step 3: Remove Old Lights
Using a screwdriver or socket wrench, remove the screws or bolts holding the old lights in place. Gently pull the lights away from the trailer, exposing the wires connected to them.
Step 4: Disconnect the Wires
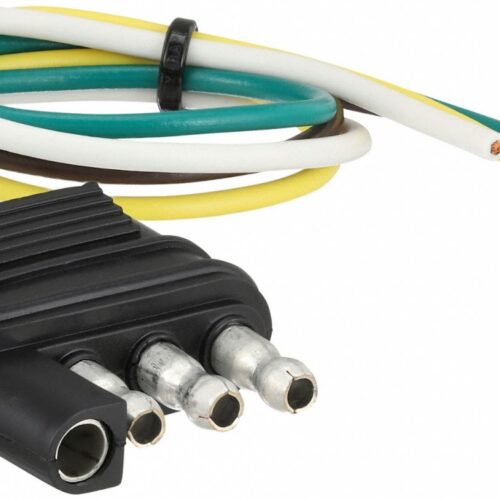
Carefully disconnect the wires from the old lights. Note the color-coding (typically white for ground, brown for taillights, yellow for left turn/brake, and green for right turn/brake), as you’ll need to reconnect the new lights in the same way.
Step 5: Connect the New Lights
Connect the wires from the new lights to the corresponding wires on the trailer using wire connectors. If you’re using butt connectors, strip about half an inch of insulation from each wire, insert them into the connector, and crimp them securely. If you’re soldering, twist the wires together and solder them, then insulate the connection with electrical tape.
Step 6: Test the Lights
Once all the wires are connected, turn the power back on and test the lights. Have someone stand behind the trailer to confirm that all lights are functioning correctly: taillights, brake lights, turn signals, and reverse lights if applicable.
Step 7: Secure the New Lights
A Beginner’s Guide to Trailer Lights: How to Change Them
Trailer lights are an essential safety feature for anyone towing a trailer, camper, or boat. They help signal your intentions to other drivers, making sure you can change lanes, turn, and brake safely. However, they’re also one of the more overlooked parts of a trailer until something goes wrong. If you’ve noticed your lights flickering, not working, or just want to upgrade them, fear not! In this guide, we’ll walk you through the process of changing trailer lights step by step.
Why Change Trailer Lights?
Before diving into the “how,” let’s quickly discuss why you might need to change trailer lights:
- Faulty Lights: If your lights aren’t working or are malfunctioning, it’s crucial to replace them promptly. This ensures your safety and the safety of others on the road.
- Upgrade: Maybe you’re looking to upgrade to brighter LED lights for better visibility or aesthetics. Upgrading can be a great investment in the long run, offering increased durability and energy efficiency.
- Regular Maintenance: Like any part of your vehicle or trailer, trailer lights require regular maintenance. Even if they’re still working, it’s a good idea to inspect and replace them periodically to avoid issues on the road.
Tools You’ll Need
Before you begin, gather these basic tools:
- New trailer lights (LED lights are recommended for their longevity)
- Screwdriver or socket wrench (depending on your trailer’s setup)
- Wire stripper/cutter
- Electrical tape
- Wire connectors (butt connectors or soldering equipment)
Step 1: Assess the Situation
Start by identifying which lights need to be replaced. Most trailers have at least two taillights, two brake lights, and usually one or more turn signal lights on each side. Check both the trailer and the towing vehicle to ensure you’re not missing anything.
Step 2: Disconnect the Power
For safety, disconnect the trailer from the towing vehicle and turn off the power to the trailer lights. This might involve unplugging the trailer from the towing vehicle or removing a fuse from the vehicle’s fuse box.
Step 3: Remove the Old Lights
Using a screwdriver or socket wrench, remove the screws or bolts holding the old lights in place. Gently pull the lights away from the trailer, exposing the wires connected to them.
Step 4: Disconnect the Wires
Carefully disconnect the wires from the old lights. Note the color-coding (typically white for ground, brown for taillights, yellow for left turn/brake, and green for right turn/brake), as you’ll need to reconnect the new lights in the same way.
Step 5: Connect the New Lights
Connect the wires from the new lights to the corresponding wires on the trailer using wire connectors. If you’re using butt connectors, strip about half an inch of insulation from each wire, insert them into the connector, and crimp them securely. If you’re soldering, twist the wires together and solder them, then insulate the connection with electrical tape.
Step 6: Test the Lights
Once all the wires are connected, turn the power back on and test the lights. Have someone stand behind the trailer to confirm that all lights are functioning correctly: taillights, brake lights, turn signals, and reverse lights if applicable.
Step 7: Secure the New Lights
If everything is working properly, secure the new lights onto the trailer using the screws or bolts you removed earlier. Make sure they’re firmly attached and properly aligned.
Step 8: Final Check
Give everything one last inspection to ensure all connections are secure and there are no loose wires. Additionally, check that the lights are positioned correctly and shining in the right direction.
Changing trailer lights might seem daunting at first, but with the right tools and a little know-how, it’s a manageable task for most DIY enthusiasts. Regularly maintaining your trailer lights not only ensures your safety on the road but also helps prevent potential accidents and traffic violations. Whether you’re replacing faulty lights or upgrading to more modern LEDs, following these steps will have your trailer shining bright in no time!